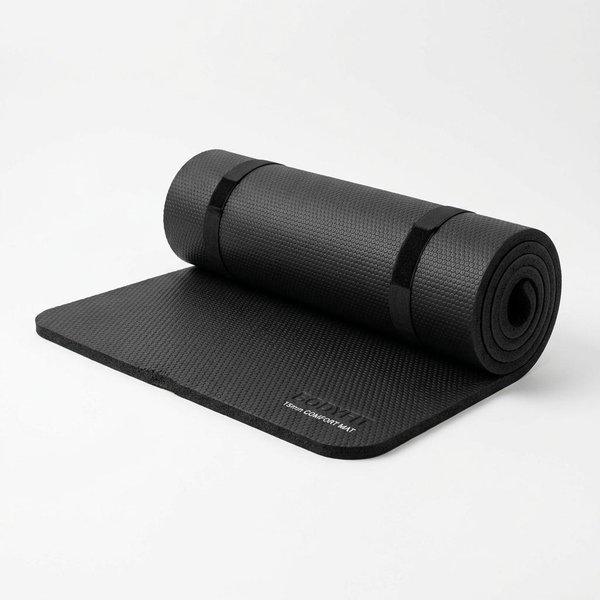
The installation method is as important as the flooring material itself. A perfectly specified rubber floor installed with permanent adhesive destroys your security deposit; a budget foam tile system installed with proper subfloor preparation outperforms premium materials installed carelessly.
This guide covers three renter-safe installation methods for the most common apartment gym flooring types, with step-by-step procedures, common mistakes, and removal protocols that ensure full deposit recovery.
Pre-Installation: Subfloor Assessment
Before placing any material, inspect and prepare the existing floor. This 15-minute step prevents 90% of flooring problems.
Floor Type-Specific Preparation
Hardwood Floors:
- Clean thoroughly with hardwood-safe cleaner; allow to dry completely
- Inspect for existing scratches, dents, or finish wear—photograph for move-out documentation
- Place furniture felt pads under equipment feet (even atop rubber flooring)
- Critical: Do not use rubber stall mats directly on unfinished hardwood; the rubber-chemical interaction can stain unsealed wood within 6–12 months
Laminate/LVP Flooring:
- Verify floor is floating (not glued); check for existing buckling or gaps
- Clean with manufacturer-recommended product
- Ensure subfloor is dry—moisture trapped under rubber promotes mold in laminate core
- Critical: Heavy equipment on floating floors can create pinch points; use load-distribution pads under rack legs
Tile Flooring:
- Clean and inspect grout lines
- Check for cracked or loose tiles—document pre-existing damage
- Rubber over tile is generally safe; cork underlayment provides cushioning and prevents grout abrasion
- Critical: Dropped weights on tile with thin flooring can crack tiles regardless of protection
Carpet:
- Vacuum thoroughly; consider steam cleaning if carpet will be covered long-term
- Rubber over carpet compresses carpet fibers; this is generally reversible but may require professional cleaning upon removal
- Interlocking tiles work better than rolls on carpet due to conformability
- Critical: Thick carpet (over 1/2 inch pile) can cause interlocking tiles to separate
Method 1: Interlocking Tile Installation
Best for: EVA foam tiles, rubber puzzle tiles, cork interlocking systems Skill level: Beginner Time required: 30–60 minutes for 100 sq ft Tools needed: Utility knife, straightedge, tape measure
Step-by-Step Installation
Step 1: Layout Planning Measure your workout space and calculate tile requirements. Most interlocking tiles are 24" × 24" (4 sq ft each). Order 10% extra to account for cutting errors and future replacement needs.
For a 10' × 10' room:
- Exact coverage: 25 tiles
- With 10% overage: 28 tiles
Step 2: Direction Decision Tiles interlock with a puzzle-edge pattern. Determine the direction of installation to minimize visible seams:
- Install from the room's most visible corner
- Work toward the least visible wall (where cuts will be hidden)
- Maintain consistent interlock direction—reversing tile orientation breaks the pattern
Step 3: Border Gap Leave a 1/4–1/2 inch gap between tiles and walls. This accommodates:
- Thermal expansion (rubber expands in heat)
- Prevents wall-scuffing during tile movement
- Allows air circulation to prevent moisture buildup
Step 4: Cutting Tiles For wall-adjacent tiles:
- Place a full tile in position, overlapping the last installed tile
- Mark the cut line using the installed tile edge as a guide
- Score deeply with a sharp utility knife (multiple passes)
- Bend to snap along the score line
- Use scissors or knife to clean the cut edge
Pro tip: A drywall T-square provides the straightest cuts. For curved cuts (around pillars or vents), use heavy-duty scissors after scoring.
Step 5: Securing Edges Interlocking tiles rarely need additional securing on hard floors. If edges lift or separate:
- Apply double-sided carpet tape at perimeter corners only (not full perimeter)
- Use interlocking edge pieces (available from most manufacturers)
- For carpet installations, the carpet pile often provides sufficient grip
Step 6: Final Inspection Walk the entire installation, checking for:
- Seam gaps (should be minimal; <1/16 inch acceptable)
- Height inconsistencies at seams (indicates subfloor debris)
- Loose tiles requiring additional interlock pressure
Method 2: Rolled Rubber Installation
Best for: Large coverage areas (150+ sq ft), permanent or semi-permanent setups Skill level: Intermediate (requires 2+ people for rolls over 100 lbs) Time required: 1–2 hours for 200 sq ft Tools needed: Utility knife, straightedge, tape measure, knee pads
Step-by-Step Installation
Step 1: Acclimation Unroll flooring and allow it to acclimate for 24–48 hours before cutting. Rubber rolls arrive tightly rolled and will contract or expand as they relax.
Step 2: Roll Positioning Position the roll at the room's longest wall. For multiple rolls:
- Overlap rolls by 2–3 inches at seams
- Maintain consistent grain direction (rubber has a subtle grain from manufacturing)
- Align factory-cut edges to walls when possible
Step 3: Cutting to Length
- Unroll to the far wall
- Allow roll to relax against the wall with slight compression
- Mark cut line using straightedge
- Cut with sharp utility knife, applying firm, consistent pressure
- Multiple score passes (3–5) produce cleaner cuts than single deep cuts
Step 4: Seam Treatment For multiple rolls, seam options include:
- Butt seam: Simply butting edges together; acceptable for home gyms
- Tape seam: Apply double-sided carpet tape beneath the seam overlap, then trim excess
- Glue seam: Not recommended for renters (permanent adhesion)
Step 5: Securing Rolled rubber's weight (1–2 lbs per sq ft) typically provides sufficient hold. For security:
- Double-sided carpet tape at room perimeter, 12-inch intervals
- No adhesive in field area—allows future repositioning
- Consider rubber mat clips at seam intersections for multi-roll installations
Handling Heavy Rolls (Upstairs Units)
A 4' × 25' roll of 3/8-inch rubber weighs approximately 150–180 lbs. For walk-up apartments:
- Cut before carrying: Order custom-cut lengths from supplier, or cut full rolls into manageable sections (6–8 ft) using a circular saw with fine-tooth blade
- Carry vertically: Roll standing on end, carried by two people (one at each end)
- Use a hand truck: Essential for moves between floors
- Plan the path: Measure stairwells and doorways before delivery; rubber rolls do not bend around tight corners
Method 3: Stall Mat Installation
Best for: Heavy lifting zones, budget installations, maximum durability Skill level: Beginner (but physically demanding) Time required: 15–30 minutes for 2–4 mats Tools needed: Optional—utility knife for trimming
Step-by-Step Installation
Step 1: Mat Selection Standard horse stall mats measure 4' × 6' × 3/4" and weigh approximately 95–100 lbs each. For apartment gyms:
- 2 mats (48 sq ft): Sufficient for a deadlift platform or bench press zone
- 4 mats (96 sq ft): Covers a compact home gym (8' × 12')
- 6+ mats: Full room coverage
Step 2: Delivery and Placement Stall mats are available at:
- Tractor Supply Company (most locations; in-store pickup)
- Local feed stores
- Amazon (delivered to door; premium over in-store pricing)
For upstairs delivery: Two strong people required per mat. Alternatively, some Tractor Supply locations offer loading assistance; arrange a friend with a truck for in-store pickup.
Step 3: Positioning Simply place mats in desired configuration. Options:
- Butted: Mats touching edge-to-edge; minimal seam gap
- Gapped: 1/4–1/2 inch gap between mats; easier to remove individually
- Overlapped: Not recommended; creates height inconsistency and trip hazard
Step 4: Securing Stall mats rarely need securing due to weight. If edges curl or mats shift:
- Heavy-duty double-sided tape at mat corners
- Gorilla Tape across seams (temporary, removable)
- Anti-curl rug grippers beneath mat corners
Step 5: Trimming If a mat must be trimmed for room fit:
- Mark cut line with chalk or marker
- Score deeply with utility knife (5–10 passes for 3/4" rubber)
- Bend along score line to snap
- Clean cut edge with knife
Alternative: A jigsaw with a fine-tooth blade produces cleaner cuts but generates rubber dust—vacuum immediately and wear a dust mask.
Layered Installations: Maximum Noise Reduction
For noise-critical upstairs units, multi-layer installations provide superior performance:
Configuration: Cork + Rubber
Materials:
- 1/4" cork underlayment (4' × 6' sheets or rolls)
- 3/8"–3/4" rubber flooring (tiles, rolls, or stall mats)
Installation:
- Lay cork sheets directly on subfloor (no adhesive; cork grips most hard surfaces)
- Butt cork edges; tape seams with masking tape to prevent shifting during upper layer placement
- Install rubber flooring over cork using standard methods
- The cork layer provides decoupling; the rubber provides mass and impact absorption
Expected improvement: 3–6 dB additional impact reduction versus rubber alone [NRC-IRC, 2023].
Removal Protocol for Move-Out
The defining characteristic of renter-friendly installation is complete reversibility. Follow this protocol to ensure full security deposit recovery:
30 Days Before Move-Out
- Photograph current flooring installation and underlying floor condition
- Begin gradual removal (one section per weekend) to allow floor acclimation
- Inspect underlying floor for any marks, stains, or compression
Removal by Flooring Type
Interlocking Tiles:
- Simply lift and disconnect
- Check for floor marking; clean with appropriate cleaner
- If carpet compression occurred, steam clean or hire professional cleaning
Rolled Rubber:
- Remove any carpet tape carefully (use adhesive remover if residue remains)
- Roll flooring for transport or disposal
- Clean subfloor thoroughly
Stall Mats:
- Lift and remove (physical effort required)
- Inspect for rubber staining on vinyl or unfinished wood (rare but possible after 2+ years)
- Clean with hardwood/laminate cleaner as appropriate
Floor Restoration
If flooring left marks:
- Hardwood: Minwax Hardwood Floor Reviver for minor wear; professional refinishing for significant damage
- Laminate: Replacement of damaged planks (keep spare planks if available from landlord)
- Tile: Grout cleaning for discoloration; professional tile cleaning for stubborn marks
- Carpet: Professional steam cleaning; carpet replacement if fiber damage is significant
Common Installation Mistakes
Mistake 1: Installing over dirty floors Grit and debris trapped under flooring act as acoustic bridges, transmitting vibration directly to the subfloor. Always clean thoroughly before installation.
Mistake 2: Wall-to-wall tight installation Flooring needs expansion gaps. Rubber expands in heat; without gap, edges buckle and create trip hazards.
Mistake 3: Using adhesive in rental units Even "removable" adhesives often leave residue. Use mechanical securing (tape at edges, weight-based hold) exclusively.
Mistake 4: Ignoring moisture Rubber over damp subfloors traps moisture, promoting mold and mildew. If subfloor feels damp, use a moisture barrier layer or address the source before installing.
Mistake 5: Incorrect seam direction On rolled installations, seams should run perpendicular to primary equipment orientation (e.g., across the room for a treadmill placed against the wall) to minimize seam stress.
References
- National Research Council Institute for Research in Construction (2023). Installation Best Practices for Resilient Flooring in Multi-Family Housing.
- Resilient Floor Covering Institute (2025). RFCI Installation Guidelines for Rubber Flooring.
- ASTM F1869 (2025). Standard Test Method for Measuring Moisture Vapor Emission Rate of Concrete Subfloor.
- Building Research Establishment (2022). Subfloor Preparation and Its Impact on Flooring Acoustic Performance.
Last updated: January 2025. All methods designed for complete reversibility. Verify your lease terms regarding temporary flooring modifications.