Amazon Basics vs Yes4All Fitness Equipment: Budget Gear Comparison
Comprehensive comparison of Amazon Basics vs Yes4All fitness equipment covering dumbbells, kettlebells, resistance bands...
Research-backed analysis from SnugGym about Home Gym Essentials Checklist.
A comprehensive, tiered checklist for assembling a functional, safe, and motivating home gym regardless of your budget, available space, or training experience.
Building a home gym is one of the most impactful investments you can make in your long-term health and fitness. Unlike commercial gym memberships that drain your bank account monthly regardless of usage, a well-planned home gym pays for itself over time while eliminating the friction that prevents consistent training — commute time, crowded equipment, inconvenient hours, and the psychological barrier of exercising in public.
Research published in the International Journal of Environmental Research and Public Health found that home exercisers demonstrate higher adherence rates to training programs compared to gym members, primarily due to reduced barriers and increased convenience. When your gym is in the next room, the excuse of "not having time" loses its power.
This checklist provides a structured approach to building your home gym across four budget tiers: $100, $300, $500, and $1000. Each tier represents a meaningful upgrade in capability, and you can start at any level and expand progressively. The goal is not to spend as much as possible but to spend as wisely as possible — every item on this list earns its place through genuine training value.
FTC Disclosure: This article contains affiliate links. We may earn a commission if you purchase through these links — at no extra cost to you. Our recommendations are based on editorial assessment, not affiliate relationships.
At $100, you are not building a complete gym — you are building a functional training kit that covers the essential movement patterns. This tier proves that fitness requires equipment, not expense.
| Item | Approximate Cost | Purpose |
|---|---|---|
| Resistance band set (5 bands) | $25–35 | Full-body strength, pull assistance, mobility |
| Jump rope | $10–15 | Cardio, conditioning, coordination |
| Yoga/exercise mat | $20–30 | Floor work, stretching, comfort |
| Foam roller | $15–25 | Recovery, myofascial release |
| Pull-up bar (doorway) | $25–35 | Vertical pulling, hanging, grip |
Total: $95–140 (Prioritize bands, mat, and jump rope if under $100; add pull-up bar and foam roller as budget allows.)
Training capability at this tier: You can perform pushing movements (push-ups, band presses), pulling movements (rows, assisted pull-ups), lower body work (squats, lunges, band-resisted movements), cardio (jump rope), core training, flexibility work, and recovery. This is genuinely sufficient for meaningful fitness improvements — many people have transformed their bodies with less.
What you sacrifice: Progressive overload becomes challenging as you get stronger. Leg training in particular is limited without external loading. The doorway pull-up bar is less versatile than mounted alternatives. Cardio options are limited to jump rope and bodyweight movements.
At $300, you add fundamental loadable equipment that enables progressive resistance training — the key to long-term strength and muscle development.
| Item | Approximate Cost | Purpose |
|---|---|---|
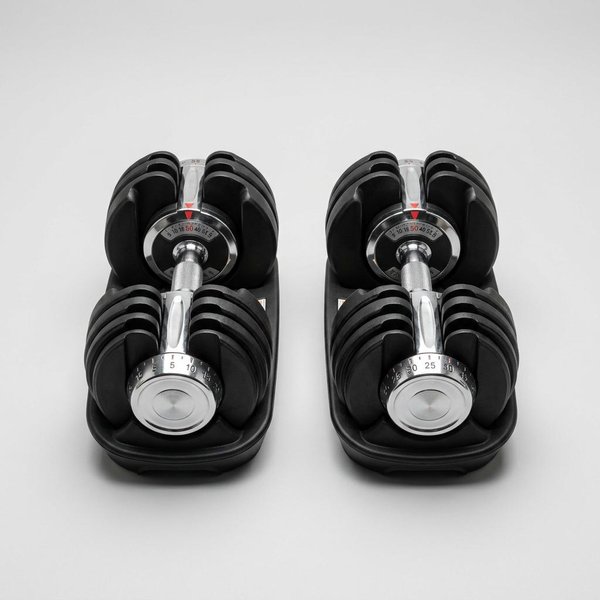
| Adjustable dumbbells (pair, up to 25–50 lb) | $100–150 | Loadable pressing, rowing, lunges, curls |
| Kettlebell (35–45 lb) | $50–70 | Swings, Turkish get-ups, goblet squats |
| Additional weight plates (if plate-loadable) | $30–50 | Progressive overload |
| Storage solution (wall hooks or rack) | $20–40 | Organization, space efficiency |
Running total: $295–440
Training capability at this tier: You now have genuine progressive resistance for all major movement patterns. Adjustable dumbbells enable chest presses, shoulder presses, bent rows, lunges, step-ups, and isolation work. The kettlebell adds explosive hip training, core challenges, and a complete lower-body loading option. You can follow structured strength programs and measure progress through load increases.
What you gain over Tier 1: The ability to train legs with meaningful resistance, progressive overload for upper body movements, training variety that prevents boredom, and the foundation for intermediate-level programming.
At $500, your home gym becomes a comprehensive training facility capable of supporting virtually any fitness goal — strength, muscle building, conditioning, and mobility.
| Item | Approximate Cost | Purpose |
|---|---|---|
| Flat workout bench | $80–120 | Bench press, rows, step-ups, split squats |
| Heavier adjustable dumbbells or plate set | $80–120 | Increased loading capacity |
| Second kettlebell (heavier or lighter) | $50–70 | Double kettlebell work, varied loading |
| Lifting gloves or straps (optional) | $15–25 | Grip support, callus prevention |
Running total: $505–775
Training capability at this tier: With a bench and heavier loads, you can perform flat dumbbell presses, supported rows, Bulgarian split squats, step-ups, and dozens of bench-supported isolation exercises. The expanded weight range accommodates intermediate and early-advanced strength levels. Two kettlebells enable double swings, cleans, and farmer's carries.
What you gain over Tier 2: Horizontal pressing capability, dramatically expanded lower body exercise variety, support for structured body-part splits, and loading capacity that supports training for years before requiring further investment.
At $1000, you add equipment that elevates your gym from comprehensive to exceptional — specialized tools that enhance safety, enable advanced movements, and add training modalities.
| Item | Approximate Cost | Purpose |
|---|---|---|
| Olympic barbell and weight set (300 lb) | $250–400 | Barbell squat, deadlift, press, row, clean |
| Power rack or squat stand | $200–350 | Safe squatting, benching, pull-ups, rack work |
| Weight tree or storage system | $50–80 | Plate organization, floor space protection |
| Flooring (stall mats or rubber tiles) | $50–100 | Equipment protection, noise reduction, safety |
| Collars (spring or lock-jaw) | $10–20 | Plate security |
Running total: $1,065–1,725
Training capability at this tier: You now have a facility capable of supporting powerlifting, Olympic weightlifting (with appropriate technique), CrossFit-style training, bodybuilding, strongman work, and general fitness. The power rack provides safety spotter arms for solo heavy training, pull-up bar integration, and band pegs for accommodating resistance. The barbell and 300-pound plate set enable the foundational barbell movements that form the basis of most effective strength programs.
What you gain over Tier 3: Maximum progressive overload potential, safety for solo heavy training, the ability to perform the "big three" powerlifts (squat, bench, deadlift) with proper equipment, Olympic lifting capability, and a gym that rivals commercial facilities for most training purposes.
Once the essentials are in place, these additions add training variety and convenience:
| Item | Approximate Cost | Value Added |
|---|---|---|
| Adjustable cable/pulley system | $150–300 | Cable rows, press-downs, curls, face pulls |
| Specialty barbell (safety squat, multi-grip) | $150–300 | Shoulder-friendly pressing, squat variety |
| Plyo box (adjustable) | $80–150 | Box jumps, step-ups, elevated push-ups |
| Resistance band set (heavy) | $30–50 | Band-resisted lifts, pull-ups, warm-ups |
| Ab wheel or suspension trainer | $25–50 | Core training variety |
| Dip station or dip bars | $60–120 | Dip movements, inverted rows |
| Fan (air mover) | $40–80 | Comfort during intense sessions |
| Whiteboard or chalkboard | $20–40 | Workout logging, motivation |
| Bluetooth speaker | $30–60 | Music, podcasts during training |
| Timer/Gymboss interval timer | $20–30 | Interval training, EMOM work |
Minimum viable space: 6 feet by 6 feet (36 square feet) allows basic bodyweight training and resistance band work. You can train effectively in a bedroom corner or small apartment space.
Comfortable training space: 8 feet by 8 feet (64 square feet) accommodates dumbbell work, kettlebell swings, and jump rope with adequate clearance.
Power rack space: 8 feet by 8 feet with 7+ foot ceiling height. The rack itself occupies approximately 4 feet by 4 feet, but you need clearance for barbell loading, plate changes, and movement around the rack.
Ceiling height requirements: 7 feet minimum for standing overhead movements; 8+ feet for jumping, kettlebell swings, and pull-up bars; 8.5+ feet for Olympic lifts.
Flooring: Protect your floor and your equipment with rubber flooring. Stall mats from farm supply stores (4x6 feet, 3/4-inch thick) cost $40–50 each and provide superior protection to expensive gym-brand alternatives. Cover your entire training area — dropped dumbbells and kettlebells damage floors and create noise.
| Priority | Item | Purpose |
|---|---|---|
| Essential | Flooring/ mats | Prevent equipment damage, reduce slipping |
| Essential | Power rack with spotter arms | Safe solo heavy lifting |
| Essential | Quality collars | Prevent plate slippage |
| Highly recommended | Lifting belt | Spinal support for heavy compound lifts |
| Highly recommended | Chalk or liquid grip | Secure grip, prevent bar slipping |
| Recommended | Wrist wraps | Wrist support for pressing movements |
| Recommended | Knee sleeves | Knee warmth and compression for squatting |
| Optional | Lifting shoes | Stable platform for squatting and Olympic lifts |
| Optional | Foam roller / lacrosse ball | Recovery, tissue quality maintenance |
| Optional | First aid kit | Basic supplies for minor injuries |
Disorganized equipment creates training friction — you skip exercises because setup is inconvenient, or you cannot find the equipment you need. Implement these storage solutions:
Wall-mounted storage: Vertical space is your friend. Wall-mounted hooks for resistance bands, kettlebell racks, and barbell hangers keep equipment accessible and organized.
Plate trees: Keep weight plates organized and off the floor. A simple A-frame or vertical tree prevents tripping hazards and makes plate changes efficient.
Dumbbell racks: If you have multiple dumbbell pairs, a rack keeps them organized and prevents the floor-clutter scenario that plagues home gyms.
Pegboard systems: Inexpensive and customizable, pegboard provides flexible storage for bands, straps, collars, jump ropes, and small accessories.
| Item | Purpose | Frequency |
|---|---|---|
| Disinfectant wipes or spray | Clean benches, bars, handles | After each session |
| Microfiber towels | Wipe sweat from equipment | During and after sessions |
| 3-in-1 oil or silicone lubricant | Maintain barbell sleeves, rack J-cups | Monthly |
| Nylon brush | Clean barbell knurling | Weekly |
| Air freshener or ventilation | Manage gym odors | Ongoing |
| Vacuum or broom | Remove chalk dust, debris | Weekly |
Workout log: Whether digital (app, spreadsheet) or analog (notebook, whiteboard), record your training. Progressive overload requires knowing what you did last session. The simple act of logging workouts increases adherence and motivation.
Equipment manual: Keep manuals for warranty purposes and maintenance guidance. Power racks, benches, and cardio equipment have specific assembly and care instructions.
Assembly records: Photograph your rack assembly before tightening all bolts — this documents proper construction for warranty claims and provides reference for future adjustments.
Months 1–3: Establish the training habit. Use whatever equipment you have consistently. Consistency matters more than equipment quality. Focus on learning proper movement patterns.
Months 4–6: Add progressive overload. Increase loads, add reps, or improve exercise difficulty. This is when equipment limitations may become apparent — address them based on your training goals.
Months 7–9: Refine your setup. Add equipment that fills gaps in your training. Consider specialty items based on goals (cardio equipment for conditioning focus, specialty bars for strength focus).
Months 10–12: Optimize organization and recovery. Add storage, improve lighting and atmosphere, invest in recovery tools (foam roller, stretching equipment). Your gym should feel complete and motivating.
| Priority | Upgrade | Why |
|---|---|---|
| 1 | Heavier plates / additional dumbbells | Continued progressive overload |
| 2 | Cable/pulley system | Exercise variety, isolation work |
| 3 | Specialty bars | Address limitations, add variety |
| 4 | Conditioning equipment (rower, bike) | Cardio capacity, work capacity |
| 5 | Recovery tools (stretching machine, etc.) | Longevity, injury prevention |
| 6 | Environment upgrades (lighting, sound) | Motivation, training atmosphere |
The perfect home gym is not the gym with the most equipment — it is the gym you use consistently. Start at whatever tier your budget allows, focus on developing the training habit, and expand your equipment as your commitment and needs grow. A $100 investment in consistent training produces infinitely better results than a $5,000 gym that goes unused.
The checklist above provides a roadmap. Your specific path will depend on your goals, space, budget, and training preferences. Use this framework to make intentional purchasing decisions rather than accumulating random equipment that does not serve your training.
Evidence Mode: Research-Backed. Author: SnugGym Editorial Team. Last updated: January 2025.