Amazon Basics vs Yes4All Fitness Equipment: Budget Gear Comparison
Comprehensive comparison of Amazon Basics vs Yes4All fitness equipment covering dumbbells, kettlebells, resistance bands...
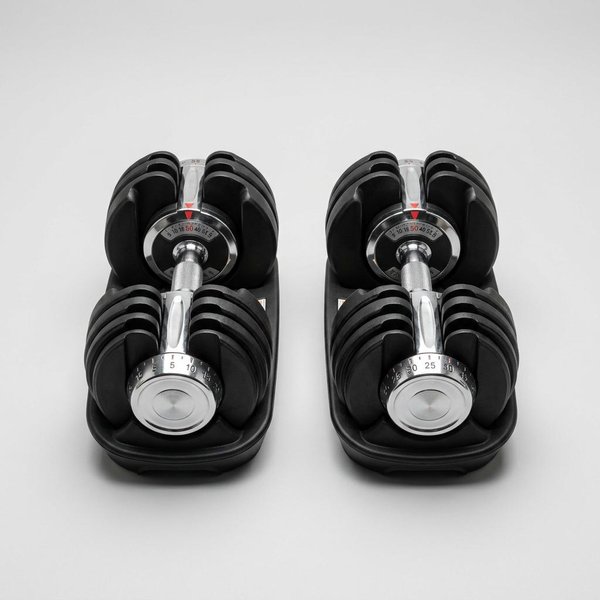
A comprehensive guide to annual deep maintenance for home gyms, covering equipment inspection, deep cleaning, lubrication schedules, bolt tightening, worn part replacement, and upgrade planning.
SnugGym is reader-supported. When you buy through links on our site, we may earn an affiliate commission at no extra cost to you.
A home gym represents a significant financial investment—typically $1,000--$10,000 in equipment alone—yet most owners perform only reactive maintenance, addressing problems after they occur rather than preventing them. Equipment that should last decades fails in years. Preventable rust claims barbells. Neglected treadmills develop $400+ repair needs that a $20 belt lubrication would have prevented.
This guide presents a comprehensive annual deep maintenance protocol that protects your investment, ensures safety, and sets the stage for another year of productive training. Schedule this maintenance during a training deload week or vacation period when the gym can be fully offline for 1--2 days.
Begin annual maintenance with a systematic inspection of every piece of equipment. Documentation at this stage provides baseline data for year-over-year comparison and informs replacement planning.
| Inspection Point | What to Look For | Action Required |
|---|---|---|
| Shaft straightness | Roll on flat surface; check for wobble | Bent bars require replacement or professional straightening |
| Knurling condition | Wear patterns; rust in knurl grooves | Brush clean; oil to prevent rust |
| Sleeve rotation | Smooth spin; no grinding or catching | Clean and lubricate sleeve bearings |
| Sleeve end play | Excessive lateral movement | Tighten snap rings or replace bushings/bearings |
| Rust or corrosion | Surface discoloration; pitting | Remove light rust with nylon brush; address environmental cause |
| Collar engagement | Secure lock; no slipping | Replace worn spring or lock-jaw collars |
Inspection frequency: Handle bars monthly; deep inspection annually. Olympic bars used 3+ times weekly should have sleeves disassembled and bearings inspected every 12--18 months.
| Type | Inspection Focus | Common Issues |
|---|---|---|
| Adjustable (dial/pin) | Adjustment mechanism smoothness; weight accuracy | Clean dial tracks; verify pin engagement; check for cracked plates |
| Hex rubber-coated | Rubber integrity; head security | Replace if rubber cracks or separates from head; tighten if loose |
| Urethane | Surface scratches; chip damage | Urethane is durable but chips; monitor for sharp edges |
| Loadable (Olympic) | Collar integrity; handle knurling | Same as barbell inspection criteria |
Weight verification: Annually verify that adjustable dumbbells register correct weights on a calibrated scale. Mechanical failures in dial systems can cause inaccurate loading—training with mismatched dumbbells creates strength imbalances and injury risk.
| Plate Type | Inspection Items |
|---|---|
| Iron/steel | Rust (surface and structural); hole diameter wear; chipping |
| Rubber-coated | Rubber delamination; exposed metal; odor (bacterial growth in porous rubber) |
| Bumper (crumb) | Density consistency; large chunks missing; steel insert looseness |
| Bumper (competition) | Diameter consistency; steel insert security; surface cracks |
| Urethane-coated | Urethane surface integrity; core adhesion |
Calibration check: Competition and calibrated plates should be weighed annually. Budget plates may vary 2--5% from stated weight—a 45 lb plate that actually weighs 43 lbs creates a 4.5% discrepancy per side that compounds across training cycles.
| Component | Inspection | Action |
|---|---|---|
| Uprights | Vertical plumb; bolt security; paint/powder coat integrity | Tighten anchor bolts; touch up rust spots |
| Crossmembers | Connection tightness; weld cracks | Torque all bolts to spec; inspect welds with flashlight |
| J-hooks/cups | Wear patterns; UHMW plastic condition | Replace UHMW inserts when worn through to metal |
| Safety arms/straps | Straightness; attachment security | Test with loaded barbell at working weight |
| Pull-up bar | Connection tightness; coating wear | Tighten; sand and repaint if rust appears |
| Band pegs | Straightness; weld integrity | Replace bent pegs; inspect welds |
| Hardware | All bolts, nuts, washers present and tight | Torque wrench verification of all fasteners |
Hardware torque specifications: Most rack manufacturers specify torque values for structural bolts. If not specified, general guidelines:
| Bolt Size | Torque (ft-lbs) |
|---|---|
| 3/8" | 25--30 |
| 1/2" | 60--75 |
| 5/8" | 110--140 |
| 3/4" | 180--220 |
Use a torque wrench to verify all fasteners annually. Vibration from dropped weights and racking/unracking loosens bolts over time.
| Equipment | Annual Inspection Items |
|---|---|
| Treadmill | Belt wear and alignment; deck surface condition; motor brush wear; roller bearing smoothness; console function; emergency stop; incline mechanism |
| Exercise bike | Chain/belt tension and wear; pedal bearing smoothness; seat post security; console calibration; resistance mechanism function |
| Rowing machine | Chain/strap wear and tension; rail cleanliness and lubrication; bungee/elastic cord tension; footplate security; monitor function |
| Elliptical | Drive belt tension; roller condition; pedal arm bearings; console function; stride smoothness |
Motor brush replacement: Treadmill motors use carbon brushes that wear over time (typically 2,000--3,000 hours). Inspect brush length annually; replace when worn to manufacturer's minimum specification (typically 1/4"--3/8" remaining).
Annual deep cleaning goes beyond routine post-workout wipes to address accumulated grime in hidden areas.
| Surface | Cleaning Method | Products to Avoid |
|---|---|---|
| Rubber flooring | pH-neutral cleaner; stiff brush; thorough rinse | Acidic cleaners (vinegar); petroleum solvents; ammonia |
| Chrome (bars, racks) | Microfiber cloth; chrome polish; buff dry | Abrasive pads; steel wool; chlorine bleach |
| Powder-coated steel | Mild soap; soft brush; dry thoroughly | Abrasive cleaners; high-pressure washers |
| Upholstery (bench pads) | Vinyl/leather cleaner; soft brush; condition after | Harsh disinfectants; alcohol-based cleaners (drying) |
| Wood platforms | Wood cleaner; damp mop; dry immediately | Excessive water; steam cleaners |
| Mirrors | Glass cleaner; microfiber cloth; horizontal then vertical strokes | Abrasive cleaners; paper towels (lint) |
| Electronics (consoles) | Electronics wipes; dry cloth; compressed air for vents | Liquid cleaners directly applied; abrasive cloths |
Proper lubrication prevents wear, reduces noise, and extends equipment lifespan. The annual maintenance session is the time to address all lubrication needs.
| Equipment | Lubrication Point | Lubricant Type | Frequency |
|---|---|---|---|
| Barbell sleeves | Bushings/bearings internally | 3-in-1 oil or manufacturer-specific | Every 3--6 months (heavy use) |
| Treadmill belt/deck | Underside of belt; deck surface | 100% silicone or manufacturer-specified | Every 3 months / 150 miles |
| Treadmill elevation screw | Threaded lift mechanism | Lithium grease | Annually |
| Bike chain | Chain full length | Bike chain lube (wet or dry per environment) | Monthly |
| Bike flywheel bearings | Bearing cups | Light machine oil | Annually |
| Rower chain | Chain full length | Chain lube or 3-in-1 oil | Every 2--3 months |
| Rower rail | Sliding surface | Silicone spray | Monthly |
| Rack J-hooks | UHMW-to-metal contact | None (UHMW is self-lubricating); inspect for debris | Clean only |
| Adjustable bench | Pivot points; pop-pin mechanisms | Lithium grease | Annually |
| Cable machine | Guide rods; pulley bearings | Light machine oil on rods; bearing grease in pulleys | Every 6 months |
| Selectorized stack | Guide rods | Silicone spray or light oil | Every 3--6 months |
Critical lubrication rule: Never mix lubricant types on the same component. If switching from one lubricant to another, thoroughly clean the old lubricant before applying the new. Incompatible lubricants can gum up, attract debris, or chemically degrade.
Vibration from training loosens bolts over time. The annual maintenance session is the comprehensive tightening check that prevents the gradual degradation that leads to equipment failure.
Annual inspection identifies parts requiring replacement. Proactive replacement during scheduled maintenance prevents mid-training failures.
| Part | Signs of Wear | Replacement Cost | DIY Difficulty |
|---|---|---|---|
| Treadmill belt | Fraying edges; smooth worn areas; slippage | $80--$200 | Moderate |
| Treadmill deck | Smooth worn area under belt; exposed wood/metal | $100--$300 | Moderate |
| Treadmill motor brushes | Brushes worn to <1/4"; motor sparking | $15--$40 | Easy |
| Bike drive belt | Cracking; fraying; slipping under load | $30--$80 | Moderate |
| Rowing machine bungee | Loss of tension; visible wear; inconsistent resistance | $40--$90 | Easy |
| Rowing machine strap | Fraying; stitching failure | $25--$60 | Easy |
| Barbell bushings/bearings | Grinding; rough sleeve rotation; end play | $20--$50 | Moderate |
| J-hook UHMW inserts | Wear through to metal; cracking; deformation | $15--$40/set | Easy |
| Cable machine cables | Fraying; kinking; coating wear | $30--$80 | Moderate |
| Bench upholstery | Tears; compression set; delamination | $40--$100 | Moderate |
| Rubber flooring | Tears; significant compression; delamination | $2--$5/sq ft | Easy |
| Collars | Spring fatigue; lock mechanism failure | $10--$40/pair | Easy |
Annual replacement budget: Plan $100--$300 annually for worn part replacement, depending on equipment quantity and use intensity. This is significantly less than the cost of major repairs or premature equipment replacement that neglected maintenance causes.
Gym flooring absorbs the most abuse and requires the most thorough annual cleaning.
Annual maintenance is the ideal time to reassess gym layout based on a year of actual usage data.
| Question | If Yes | Action |
|---|---|---|
| Is most-used equipment easily accessible? | No | Reposition for better access |
| Are traffic paths clear during workouts? | No | Rearrange for 3'+ clearance |
| Is there unused equipment taking up space? | Yes | Sell, donate, or relocate |
| Is storage adequate for current equipment? | No | Add shelving, hooks, or bins |
| Are there new equipment needs? | Yes | Plan purchases and space allocation |
| Is the layout optimal for your current programming? | No | Redesign around current training focus |
Annual maintenance provides the data needed for informed upgrade decisions.
| Priority | Criteria | Examples |
|---|---|---|
| Safety-critical | Failure risk could cause injury | Worn J-hook inserts; loose rack bolts; frayed cables |
| Performance-limiting | Current equipment restricts training | Insufficient weight capacity; limited range of motion |
| Comfort/enjoyment | Reduces training satisfaction | Worn bench pad; inadequate lighting; poor ventilation |
| Efficiency | Saves time or improves workflow | Better storage; additional equipment reducing changeover |
| Expansion | Enables new training modalities | New cardio equipment; specialty bars; attachments |
Based on inspection findings, create a prioritized upgrade list with estimated costs:
| Priority | Item | Est. Cost | Target Quarter |
|---|---|---|---|
| 1 (Safety) | Replace J-hook inserts | $30 | Q1 |
| 2 (Performance) | Add fractional plates | $60 | Q1 |
| 3 (Comfort) | Replace bench pad | $80 | Q2 |
| 4 (Efficiency) | Add plate tree | $100 | Q2 |
| 5 (Expansion) | Landmine attachment | $100 | Q3 |
| Total | $370 |
Spreading planned purchases across the year makes costs manageable and allows taking advantage of seasonal sales (Black Friday fitness equipment sales typically offer 15--30% discounts).
Annual maintenance is the time to update all gym documentation:
Conclude annual maintenance by establishing goals for the next training year:
| Category | Example Goals |
|---|---|
| Training | Increase squat by 20%; achieve first pull-up; complete 500 workouts |
| Equipment | Add cable station; upgrade barbell; install better lighting |
| Space | Add 50 sq ft; install mirrors; improve ventilation |
| Maintenance | Perform monthly 15-minute checks; stay ahead of all lubrication schedules |
| Skill | Learn Olympic lifts; master handstand; complete mobility certification |
Write goals down and post them in the gym. Visible goals increase commitment and provide motivation during difficult training phases.
| Day | Tasks | Time Required |
|---|---|---|
| Day 1 Morning | Complete equipment inspection; document findings; create replacement parts list | 3--4 hours |
| Day 1 Afternoon | Order replacement parts; begin deep cleaning (flooring first) | 2--3 hours |
| Day 2 Morning | Continue cleaning; lubricate all equipment; tighten all bolts | 3--4 hours |
| Day 2 Afternoon | Replace worn parts; reorganize equipment; install upgrades | 2--3 hours |
| Day 3 | Replace equipment; final inspection; update documentation; set goals | 1--2 hours |
| Total | 12--16 hours |
For most home gyms, this is a weekend project. Larger facilities or those with significant equipment collections may require an additional day.
Q: Do I really need annual maintenance, or can I just fix things when they break? A: Reactive maintenance costs 3--5x more than preventive maintenance over equipment lifespan. A $20 belt lubrication prevents a $200 belt replacement and potential $400 deck damage. A $30 J-hook insert replacement prevents barbell damage that costs $300+ to address. Annual maintenance is insurance against catastrophic costs.
Q: What if I find problems I can't fix myself? A: Most maintenance is DIY-appropriate. For issues beyond your comfort level—electrical work, major cardio equipment repairs, structural modifications—contact a professional. Budget $200--$500 annually for professional services that complement your DIY maintenance.
Q: How do I know when equipment needs replacement versus repair? A: Replacement is justified when: repair cost exceeds 50% of replacement cost; safety-critical components show structural damage (cracked welds, bent structural members); the item has exceeded its expected lifespan and shows multiple failure modes simultaneously.
Q: Should I hire a professional for annual maintenance? A: Most home gym owners can perform annual maintenance themselves following this guide. Professional service ($300--$800 depending on gym size) is justified for: very large equipment collections (25+ pieces); complex cardio equipment requiring specialized knowledge; or owners who lack time or physical capability for DIY work.
Q: What's the most commonly neglected maintenance task? A: Treadmill belt lubrication. Data from service technicians indicates that 70%+ of premature treadmill failures result from inadequate lubrication. The $15--$20 cost of annual lubrication prevents $500--$1,500 in repairs.
Annual deep maintenance transforms home gym ownership from reactive frustration to proactive satisfaction. The 12--16 hour investment protects thousands of dollars in equipment, ensures safe training conditions, and creates the organized environment that supports consistent exercise adherence.
Schedule your annual maintenance during a natural break in training—a deload week, vacation, or seasonal transition. Mark it on your calendar as a non-negotiable appointment with your gym. The equipment that serves your fitness goals deserves this level of care.